
Browse Articles
Select a Product
null Support Directory
Browse all null articles. (Last Updated
No articles found.
Search Results
No articles found.
Articulate Localization: Using Translation Glossaries
Article Last Updated Jun 8, 2026
This article applies to:
Glossaries allow you to influence how Articulate Localization translates certain words and phrases. You can specify:
- Words and phrases that require specific translations, such as product names
- User interface terms like “bag” or “cart”
- Word and phrases you don’t want to translate, such as your company name
Note: AI translation prioritizes natural, grammatical output in the target language. It uses glossary terms when appropriate, adjusting form as needed based on context (for example, tense or singular/plural). Glossary terms that are identical in the source and target languages are expected to remain unchanged across languages, with ongoing improvements to make this behavior more consistent.
Activate a paid Localization plan to share up to 15 separate glossaries across your subscription. When translating content in Rise 360 or Storyline 360, authors can choose which glossary to use for a specific translation run. Keep reading to learn how to use the glossaries feature.
Creating Glossary Files
Each glossary starts as a single CSV file. The source language word list is entered in the first column. The corresponding translations for different target languages go in subsequent columns. Read on for step-by-step instructions.
- Download our sample CSV file (also available on the Subscription page). Open it in a spreadsheet tool like Microsoft Excel or Google Sheets. Alternatively, you can create your own spreadsheet with one of these tools.
- In the first row, enter the language codes for the languages you use—for example, “en-us” for English (US) and “fr-fr” for French (France). (See a complete list of supported language codes below.) Start with the source language in the first column, then add the target languages in the following columns.
- Populate the rows with your glossary terms for each language, one term per row.
Here’s an example:
- Download or save a copy of your spreadsheet in .csv format.
-
- Google Sheets: File > Download > Comma Separate Values (.csv)
- MS Excel for Windows: File > Save or Save as > Change the file type to CSV UTF-8 (Comma delimited) (.csv)
- MS Excel for Mac: File > Save or Save as > Change the File Format to CSV UTF-8 (Comma delimited) (.csv)
Note: A glossary .csv file can be up to 10MB in size, but each individual glossary entry must be less than 200 bytes (around 50-200 characters, depending on the language).
- If you have primary admin or 360 admin permissions, follow these steps to add the CSV file as a glossary. If you don’t have these permissions, you’ll need to ask an admin to add any glossaries to the subscription.
Adding Languages
If you need to add more target languages to a glossary file, add a column to your spreadsheet with the new language code in the first row for each additional language.
Use our language lookup tool to see which target languages are supported for your source language. You can also see if the language pair supports glossary, formality, and right-to-left. Here’s how to use it:
-
- Launch the language lookup tool in a separate browser window.
- Select your source language from the Select a Source Language dropdown.
- A table displays all the supported target languages for the chosen source language with columns for glossary, formality, and right-to-left. A green checkmark in a column means the corresponding target language supports it.
Adding Terms
- Each term in a glossary must have its own row. Enter the term in the source language in the first column. Then, add the preferred translated term for each language in each of the subsequent labeled columns.
- If two or more terms overlap, the longer (more specific) term is matched first. For example, “online training” is matched before “training”.
- Terms must not start with any of the following symbols: “=”, “+”, “@”, “-”.
- Terms must not include HTML tags.
Setting Terms Not to Translate
- To specify that a term should NOT be translated, use the same term for all languages.
Setting Terms to Ignore
- If a term doesn’t need a specific translation for one or more target languages, you can just leave it blank for these languages. The AI translation will translate the term as a non-glossary word for these target languages.
Glossary Tips
(Note: The LENB function is deprecated in Microsoft Excel.)
|
Managing Glossaries
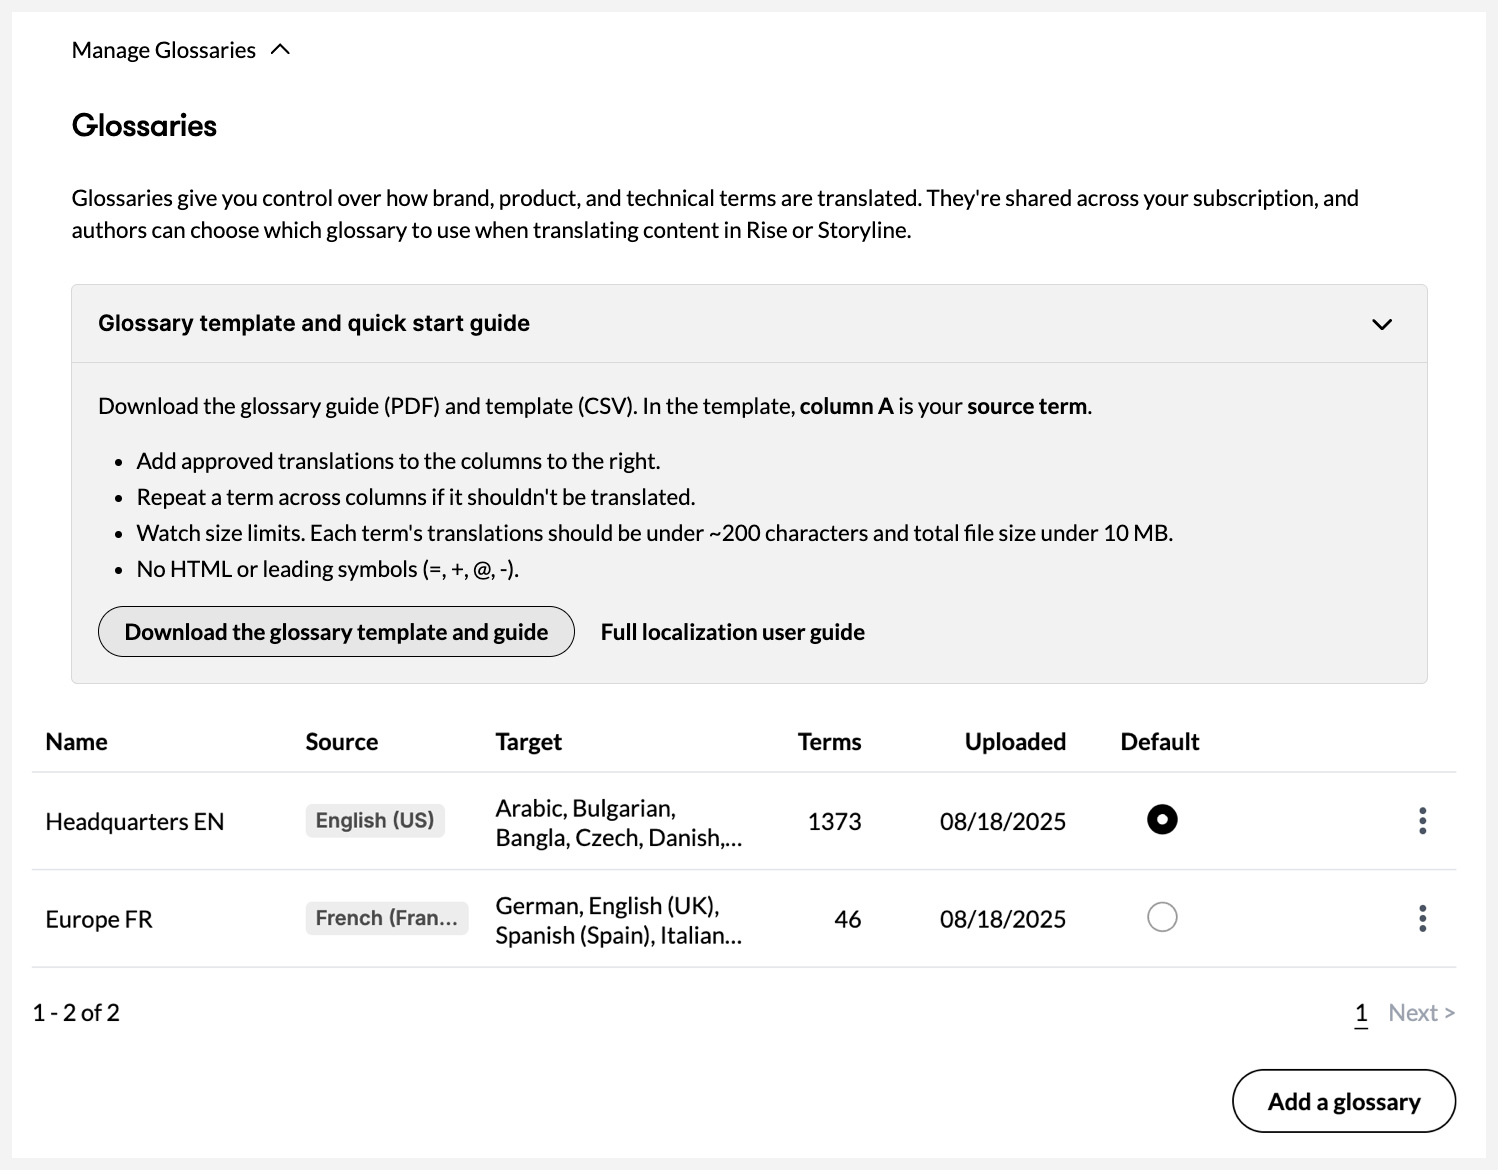
Articulate Localization supports multiple glossaries per subscription. Articulate 360 members with primary admin or 360 admin permissions can add, update, and delete glossary CSV files via the Manage Subscription page of the account management console, as shown below. If you don’t have these permissions, you’ll need to ask an admin to manage the subscription’s glossaries. Learn more below.
Adding Glossaries
If multiple glossaries are added to a subscription, authors can choose which one to use the first time they translate a course. This glossary is used for all future course translations, including additional languages and course updates.
The first glossary uploaded becomes the default glossary, but that can be changed at any time. Admins can add up to 15 glossaries per subscription. Here’s how:
- Launch the Subscription page of the account management console.
- Under the Localization section, expand Manage Glossaries.
- Click Add a glossary.
- Type in a glossary name that would help authors easily identify when to use it. For example, indicate the region or division. Or if you have different source languages for each glossary, include the source language code in the name.
- Click Choose a file, select your CSV file, and click Open.
- Click Add a glossary to upload the file.
- Processing your glossary might take up to 10 minutes after you upload it. It will be available to use after the processing is done.
- If you have more than one glossary, you can click the radio button under the Default column to choose the default.
- Once completed, authors can use the glossary when they translate Rise 360 content or Storyline 360 projects.

Rise 360

Storyline 360
Updating Your Glossary
CSV files for existing glossaries can be updated if you need to add or remove terms without disrupting the team’s workflow. Here’s how:
- Launch the Subscription page of the account management console.
- Under the Localization section, expand Manage Glossaries.
- If you need a copy of the glossary to get started, click the three vertical dots icon beside the glossary you want to update and select Download.
- Add new terms, additional languages, or otherwise update as needed, and save the file.
- Click the three vertical dots icon again and choose Update.
- Click Choose a file, select the updated CSV file, and click Open. Make sure the new file has the same source language as the current glossary you’re updating.
- Click Update glossary to upload the file.
- Processing your glossary might take a few minutes after you upload it. It will be available to use after the processing is done.
- Once completed, authors can use the glossary when they translate Rise 360 content or Storyline 360 projects.
Deleting Your Glossary
If you no longer want to use a previously defined glossary, you can delete it from the Manage Subscription page. You may also want to delete and re-add a glossary if you need to rename it. Note that deleting a glossary will remove it for everyone on your subscription. We recommend downloading a backup copy of any glossary before you delete it. Follow these steps:
- Launch the Subscription page of the account management console.
- Under the Localization section, expand Manage Glossaries.
- If the glossary you plan to delete is the default, choose a different default glossary by clicking the corresponding radio button under the Default column.
- Click the three vertical dots icon beside the glossary you want to delete and select Delete.
FAQs
Are glossary terms case sensitive?
We recommend specifying the correct case for proper nouns such as product or brand names. For general terms, listing them in lowercase is usually sufficient.
Can I choose not to use any glossary for a specific translation run?
No. If any glossary has been uploaded to your subscription, the default glossary will be used for matching language pairs unless you select a different one.
Can I choose a different glossary when updating translations?
No. The glossary you chose when you first translated a course will be used in succeeding translation updates unless it has been deleted. If that original glossary is deleted, you’ll be prompted to select a different glossary. However, an admin can update the CSV file of the chosen glossary from the Manage Subscription page.
How do I choose a glossary for translations that were run prior to the release of the multiple glossaries feature?
You’ll be prompted to select a glossary when you translate or update existing multi-language courses.
I chose the wrong glossary. How can I fix it?
You can’t change the glossary after translation, but you can retranslate all existing languages in the multi-language course to choose a different glossary. Note that this overwrites existing translations, including imported validation suggestions. To proceed, follow the steps below.
- Launch the translation dialog:
- Rise 360: Hover over the content tile for the course in your dashboard, click the more (...) icon, and select Translate.
- Storyline 360: Go to File > Localization and choose Translate Course.
- Select all languages currently in the multi-language course to enable the Glossary dropdown.
- Select the correct glossary and click Translate.
Can I have different glossaries for each language in a multi-language course?
No. Each multi-language course can only have one glossary at a time. If you have separate CSV files for each language pair, follow this guide to combine them into one file.
Can I rename an existing glossary?
You can’t rename a glossary, but you can delete and add the CSV file again with a new name. Coordinate with your team before renaming an existing glossary. Anyone who translated a course using the previous glossary will have to select a new glossary the next time they translate.