
Browse Articles
Select a Product
null Support Directory
Browse all null articles. (Last Updated
No articles found.
Search Results
No articles found.
Storyline 360: Replacing Fonts
Article Last Updated Sep 29, 2026
This article applies to:
Storyline 360 lets you quickly replace one font with another throughout your project. It scans your entire project, shows where each font is used, and lets you swap out all instances at once or update them one by one. Read on to learn how.
Open the Find and Replace Fonts Window
In Slide View, go to the Home tab on the ribbon, click the drop-down arrow next to Find/Replace, and select Replace Fonts. This opens the Find and Replace Fonts window, which lists all the fonts used in your project. An example is shown below.
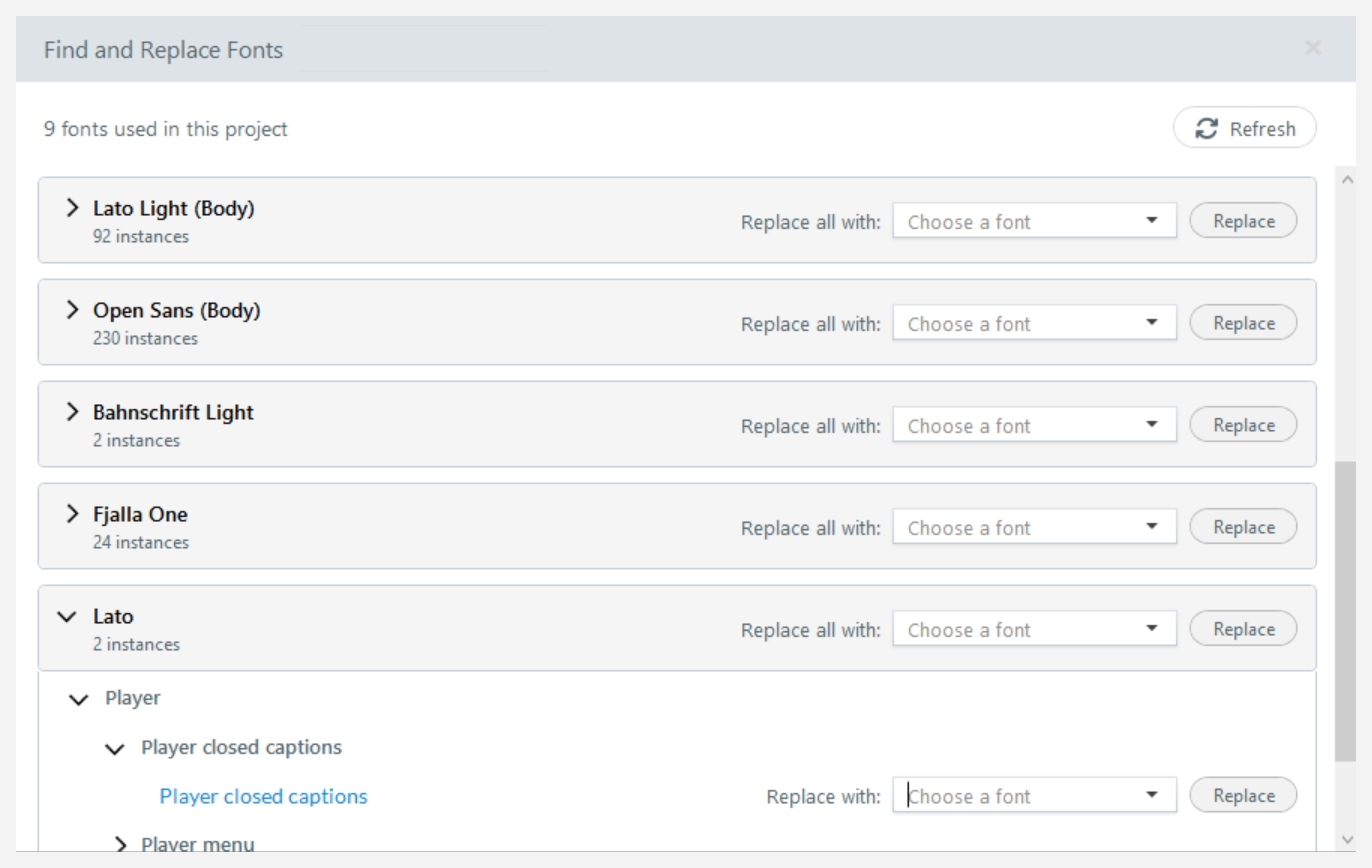
- The list includes fonts used in shapes, slide notes, player text, theme fonts, text styles, layers, slide masters, and feedback masters across your project.
- Theme fonts include “Heading” or “Body” labels that distinguish them from regular fonts. This lets you replace a regular font with a theme font, even when they’re the same font. If you replace a theme font with a regular font and the resulting combination of heading and body fonts doesn’t already exist, Storyline creates a new custom theme font for that combination.
- For multi-language projects, the list includes only the fonts used in the language version you’re currently viewing. However, replacing a theme font also affects any other language versions that use it.
Review and Replace Fonts
From the Find and Replace Fonts window, you can:
- Expand a font to see every instance of it. Clicking an object link jumps directly to that location in your project.
- See missing fonts outlined in red so you can replace them with installed fonts.
- Choose to replace all instances of the font at once or replace each instance one at a time.
- Click the Replace all with drop-down list on the font level to replace all instances.
- Click the Replace with drop-down list next to an object/item to replace individual instances.
- Press Ctrl+Z to undo the most recent font replacement. You can do this only before you make other changes. If you’ve already made other changes, replace the font again and select the original font.
The Fonts window stays open while you work, so you can continue reviewing and replacing fonts without losing your place. If you make changes outside the Fonts window, including undo or redo, click Refresh to update the results.
Note: Replacing a font changes only the font, so your text keeps the same size and formatting. However, different fonts can vary in spacing and character width. After replacing a font, review your course to make sure the text still fits as expected.