
Browse Articles
Select a Product
null Support Directory
Browse all null articles. (Last Updated
No articles found.
Search Results
No articles found.
Rise 360: Create a New Course
Article Last Updated Oct 15, 2026
This article applies to:
To create a new Rise 360 course on your dashboard, select Course in the main window and follow the content generation process. To create a blank course, click Start from blank above the main window and select Course.
You can also create a course in your Library by clicking the Create new button and continuing with AI or from a blank. If you'd like to start your course with real content templates, select the Templates option.
Note: Training content is created in the folder you're currently in. If you're in a team folder, it inherits the collaborator settings for that folder.
When starting with a blank course, the editor opens to an empty template like the one shown below.
Use the following image and the numbered list in the table below it to learn about each feature of the course editor.
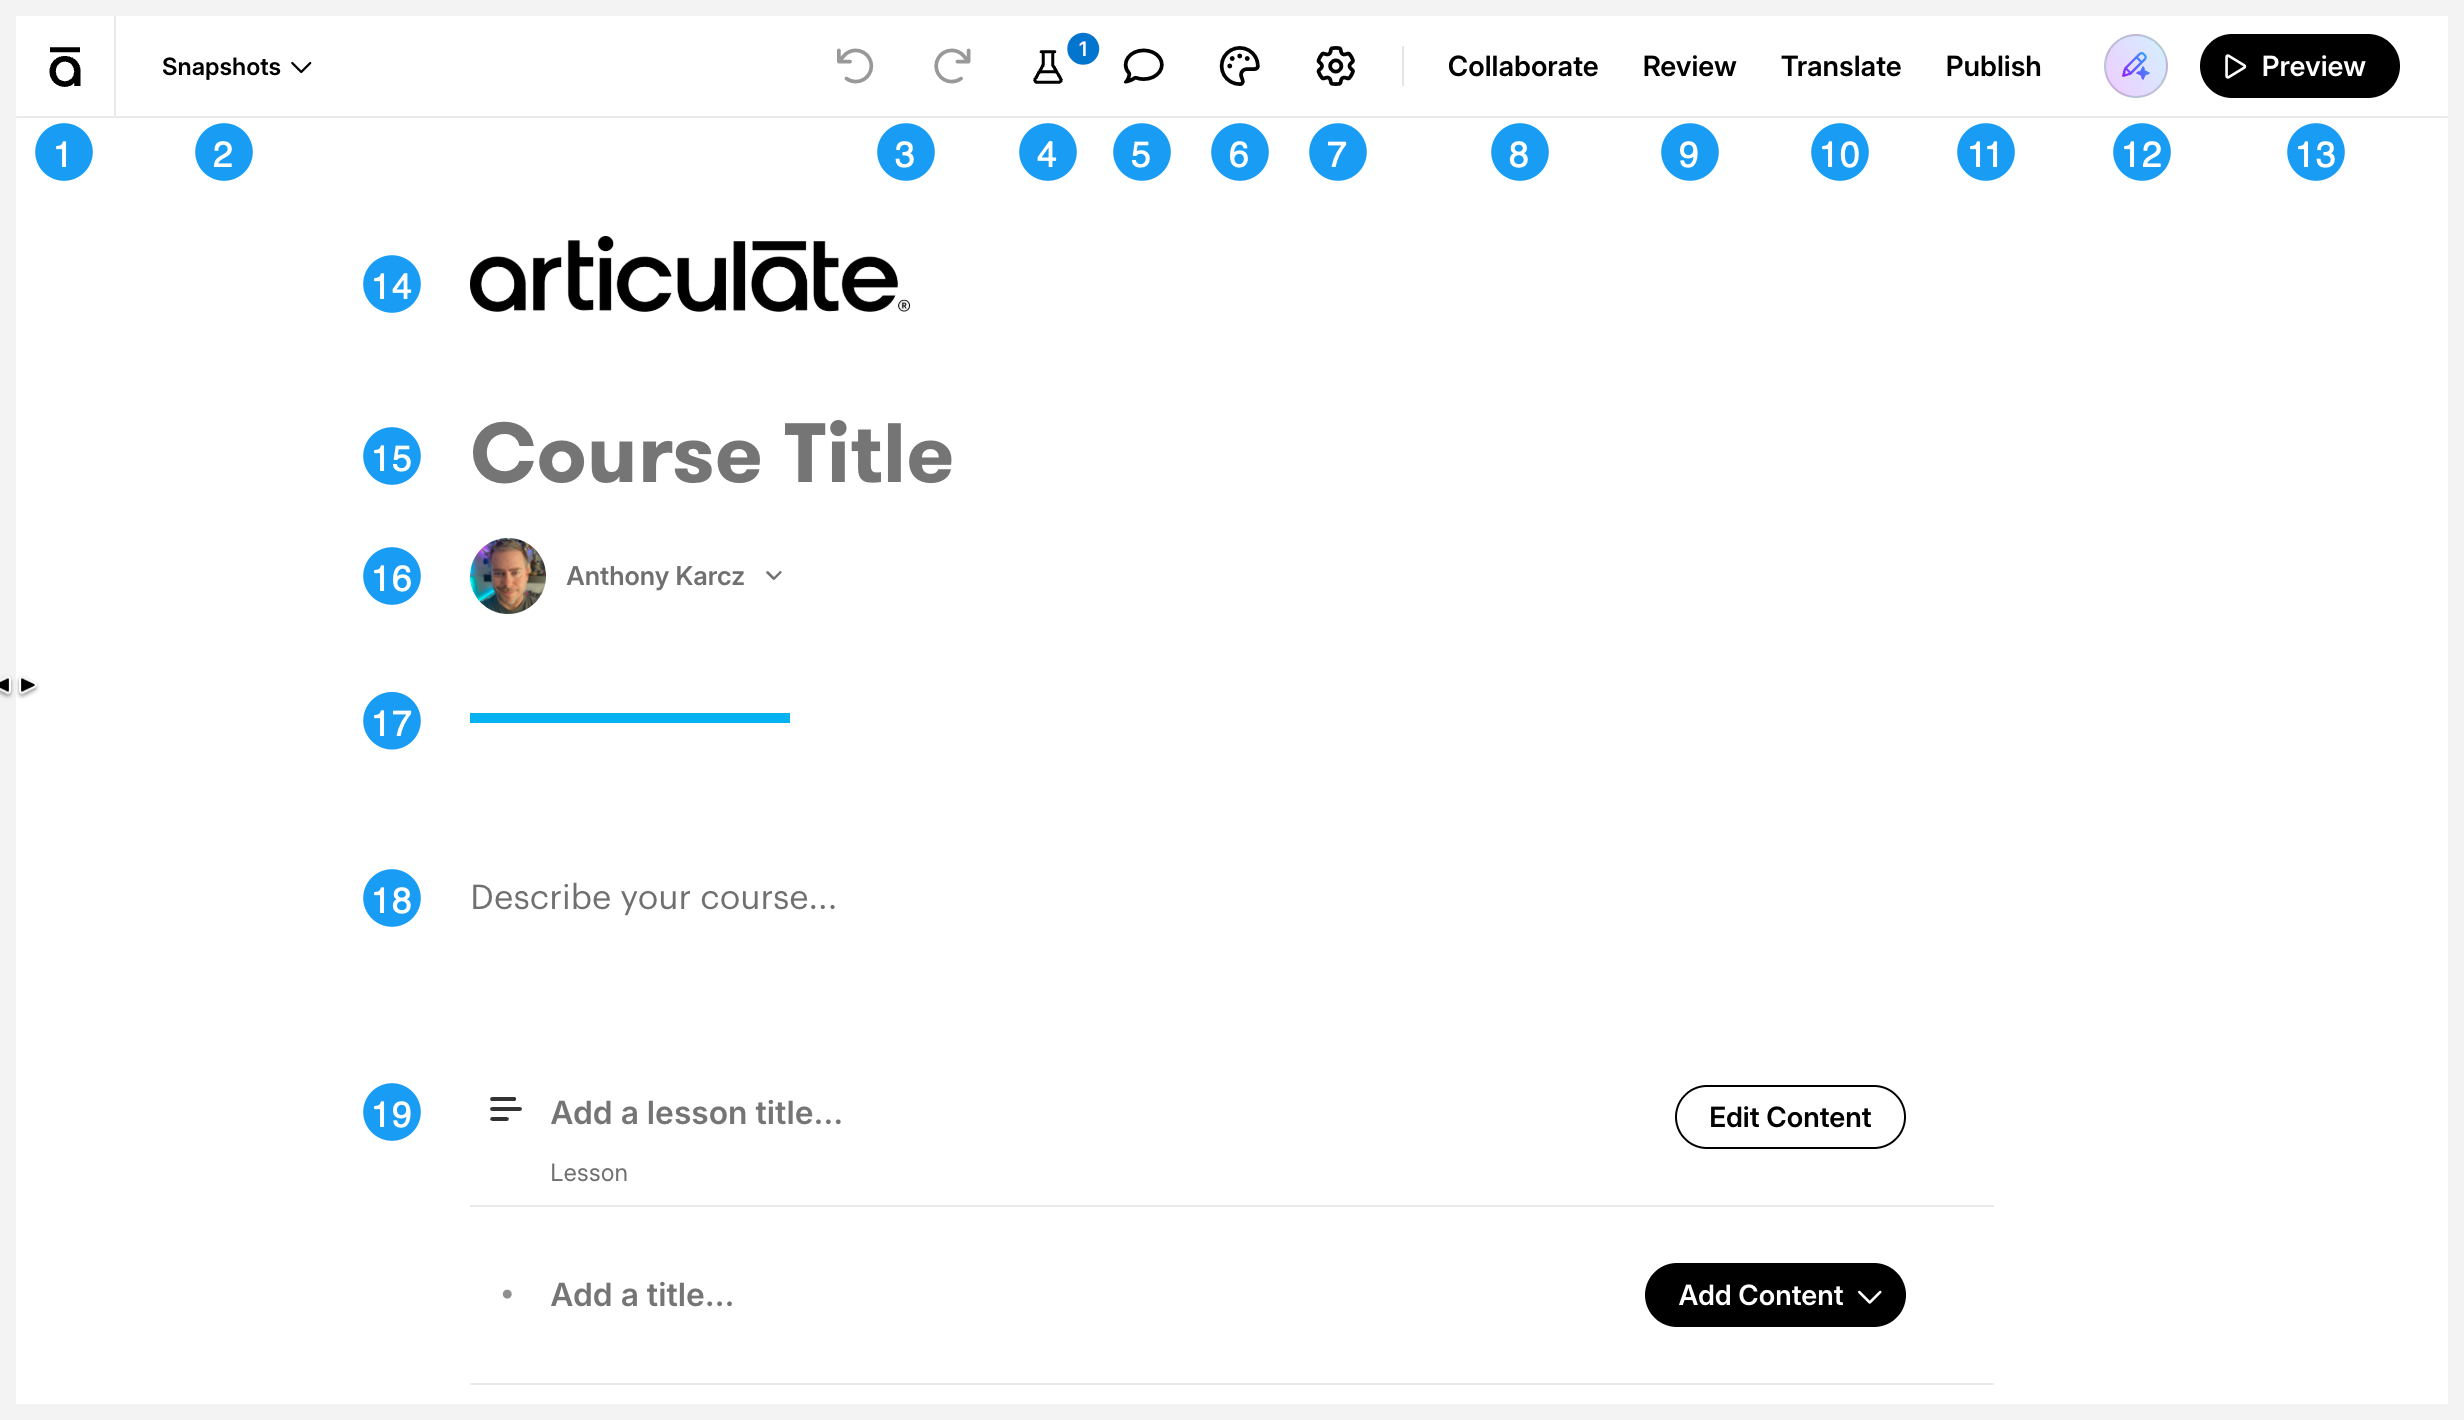
Click the image above to see a larger version.
| # | Task | Description |
|---|---|---|
|
1 |
Return to Your Library |
Click the icon in the upper left corner of the course editor to return to your library. |
|
2 |
Add a Snapshot* |
View your snapshot history and restore a previously saved snapshot (if available). |
|
3 |
Undo/Redo | |
|
4 |
Labs |
Enable and disable available Labs experiments. |
|
5 |
View Review Comments |
Reply to and resolve Review 360 comments. |
|
6 |
Theme |
Customize your course settings, including the colors, styles, and navigation. |
|
7 |
Settings |
Manage your AI source content, enable AI Tutor, manage Translations, customize your text labels*, and manage collaborators. |
|
8 |
Collaborate |
Manage collaborators. |
|
9 |
Review |
Send your content to Review 360 to collect feedback from stakeholders. |
|
10 |
Translate |
Localize your course by translating it into other languages. |
|
11 |
Publish | |
|
12 |
Update Content with AI |
Use AI to make global updates to your content. |
| 13 |
Preview Your Content | |
| 14 |
Logo |
Automatically added when a logo is included in your default Brand. |
| 15 |
Add a Title |
Enter a title for your course in the Course title placeholder—up to 100 characters. Your text will be saved automatically as you type. |
|
16 |
Show or Hide the Author |
By default, your profile picture and name appear as the course author. You can show or hide the author or collaborator. |
|
17 |
Change the Accent Color |
The accent color for your course is displayed below the title and author.The accent color appears throughout your course and gives it a consistent design. It’s used for buttons, hyperlinks, lesson status icons, radio buttons, check boxes, and more.You can change the accent color in the theme settings. |
|
18 |
Enter a Description |
A course description isn’t required, but if you’d like to give learners a brief overview of the course, just type a summary in the Describe your course placeholder.The course description appears on the cover page above the course outline. |
|
19 |
Outline Your Course |
The next step in building a Rise 360 course is to create an outline with section headers and lesson titles.After outlining your course, choose lesson and block types.Then, add text and media to your lessons. |
*Only available with a standard Articulate 360 AI license.